Your First Repository
Setup From Scratch
Git is a version control system that is widely used by developers to manage their code and track changes. Here are the basic steps to using Git:
Initialize a Git repository: To start using Git on a new project, you need to initialize a Git repository in the project directory. You can do this using the git init command in the terminal.
Add files to the repository: After you have initialized the repository, you can add files to it using the git add command. You can add individual files or entire directories.
Commit changes: After you have added files to the repository, you need to "commit" the changes to save them to the repository's history. You can do this using the git commit command. It's important to write a descriptive commit message so that you can understand the changes you made in the future.
Push to a remote repository: If you are collaborating with others or want to store your code on a remote server, you need to "push" your changes to a remote repository. You can do this using the git push command.
Clone a remote repository: If you want to work on an existing project, you can "clone" a remote repository to your local machine using the git clone command. This creates a local copy of the repository on your computer.
Pull changes from a remote repository: If you are collaborating with others and want to get the latest changes from the remote repository, you can "pull" the changes using the git pull command.
These are the basics of using Git, but there are many more advanced features that you can explore as you gain experience with the tool.
A more detailed walkthrough follows below.
Initialize a Repository
To get started, you'll want to create an empty repository.
$ git initThis will initialize a repository in the file you are currently in. If you want to initialize a repository in a new directory, you can pass an additional argument.
$ git init my-repositoryAdd Files to Staging
First create some sort of markdown file and add some text to it.
$ echo "Hello World" > README.mdThen add all the files in the current directory to the staging branch (ie the files you want to commit).
$ git add .If you only want certain files to be added to staging you can use the git add command with a file or directory name following git add my/file.
If there are certain files that you want git add . to ignore, then you can create a .gitignore file in the root of your repository. Any file or repository put in this file will be ignored by git add ..
For instance:
*.log
*.exe
testfiles
In the above example, git add . will ignore any file or directory that ends with .log or .exe or is named testfiles.
Commit Changes
Now to commit the changes you've just added to the staging branch.
$ git commit -m "first commit"git commit will commit the changes you've made to the staging branch. You can also add a message to the commit using -m - which is highly recommended. All messages should be descriptive, and should be short - less than 50 characters. They should also begin with a lowercase letter.
Linking to Github
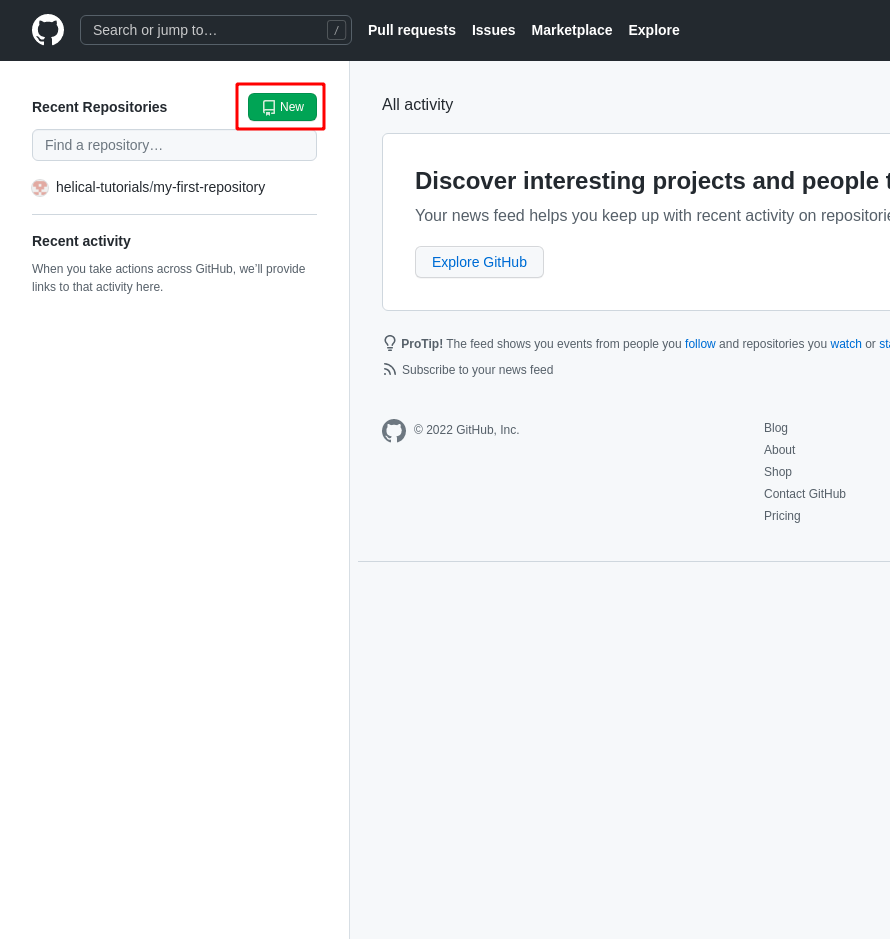
Now you need to setup a remote repository. Head over to Github and create a repository. To do this, click on the new button in the top right corner of the right hand side bar.
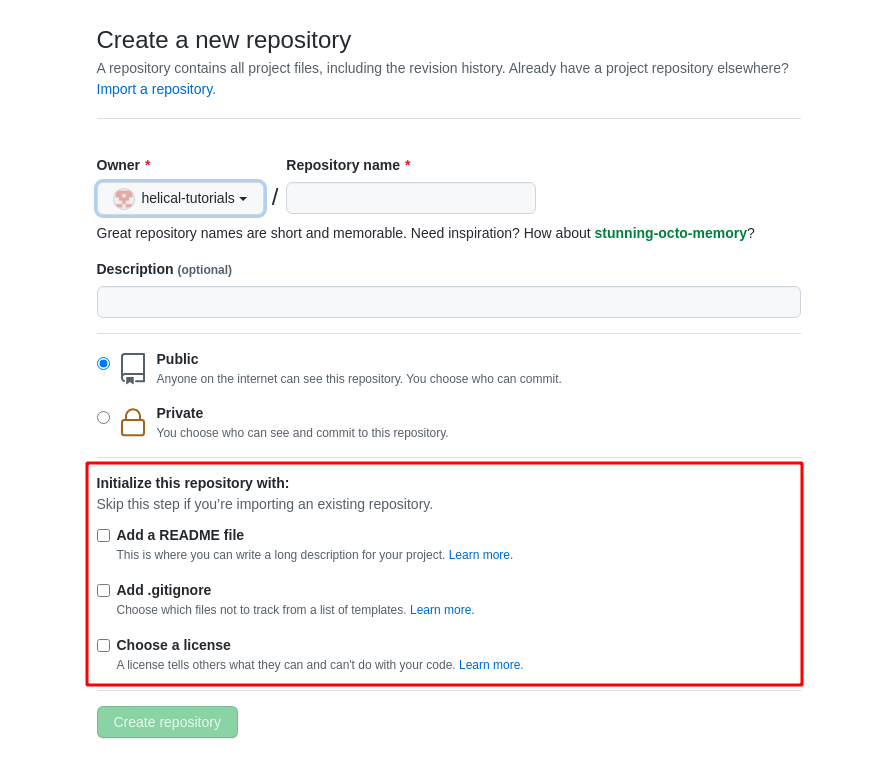
It will then ask for a name and an optional description. You will be given a choice between public and private. Public means anyone who comes across your github page can see your repository. Private means only you can see your repository. You can change this later.
Below that are some options to initialize the repository with. Leave the options unchecked, if set they can create conflicts between your local and remote repository.
Link Remote and Push
You have now successfully created a repository on github. Now you need to link the remote repository to your local repository. You will see some commands in your newly created empty repository on github. Take a look at the ones regarding pushing an existing repository.
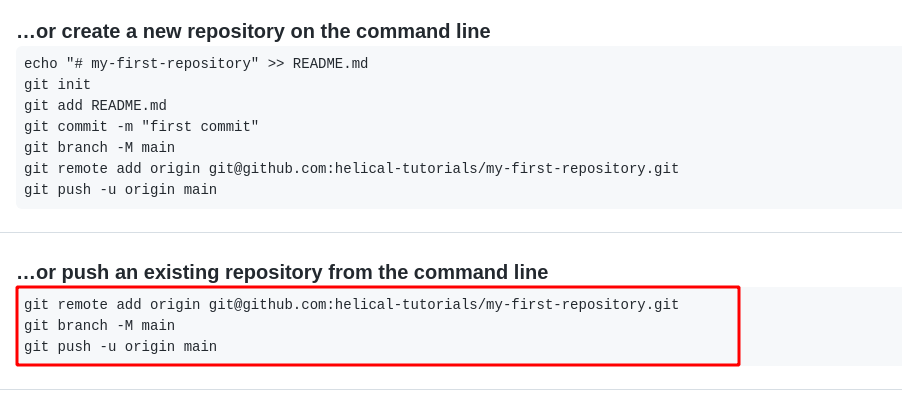
Lets work through these commands.
$ git remote add origin [email protected]:helical-tutorials/my-first-repository.gitThis will add a remote repository called origin to your local repository. This is the name of the remote repository. If you are to access any branch directly on the remote, you prefix the branch name like origin/<branch> or origin <branch>. So this command links your local repository to the remote repository.
$ git branch -M mainYou can ignore this command if you've downloaded git recently. Github used to have the default branch called master. This will change the name of the default branch from master to main.
$ git push -u origin mainThis command will push everything in your staging area of the current branch into the main branch of origin. The -u simply sets the upstream of the current branch to origin main. Which means in future, you can simply write git push and it will push everything to the main branch of origin.
And there it is. You've made a remote repository and linked it to your local repository. You can now push your changes to the remote repository. Try making a change to one of your files and then push your changes to the remote repository. Here are the commands you will need:
$ git add .
$ git commit -m "made some changes"
$ git push
Cloning a Repository
For this, you are going to clone your recently created repository from github into a new local repository.
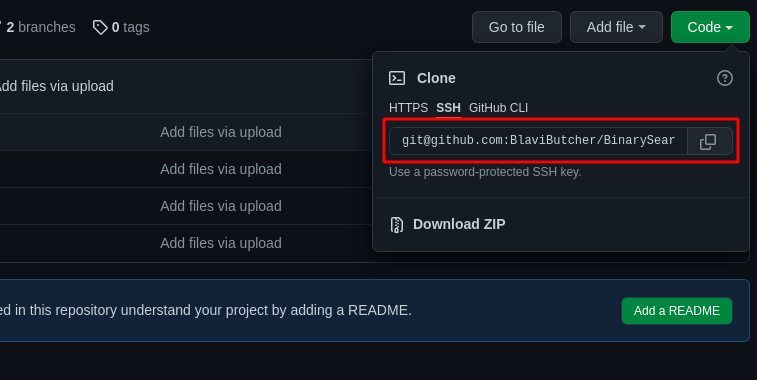
Firstly, you need to create a new directory to clone the repository into. Then head over to github and select the repository you want to clone.
Click on the green code button, then the ssh tab. Copy the link provided.
Using this link, head back to your terminal and within the empty directory you created, run the following command:
$ git clone [email protected]:helical-tutorials/my-first-repository.git .If you don't want to create a directory yourself, you can instead run:
$ git clone [email protected]:helical-tutorials/my-first-repository.git directoryNameThis will create a directory that contains the repository within it.
Another option is to automatically create a directory with the same name as the github repository.
$ git clone [email protected]:helical-tutorials/my-first-repository.gitGreat, you've successfully cloned your repository. You can now make changes to the files in the repository and push them to the remote repository.